Wednesday, January 30, 2013

Vegan French Toast

You don't need dairy to be decadent...
Vegan Sourdough French Toast
A big ol'' plate of breakfast-y goodness. 
Let's complete the breakfast trifecta, shall we? We've covered vegan pancakes and waffles, now on to the crown jewel of vegan breakfast: french toast. I was never a huge french toast lover in my pre-veg days, bread soaked in egg? Ick. Vegan french toast however, that's a different story. Its a hearty yet guilt free breakfast that can be served with any number of sweet or savory accompaniments, anything from fruits to breakfast veggies to tempeh bacon. Your mind will be blown by how easy and tasty this recipe is; its quicker to whip up than both pancakes and waffles and is much more of a show stopper. I like to use a hearty loaf of bread, like a sourdough boule,
but a pre-sliced loaf will work just as well.
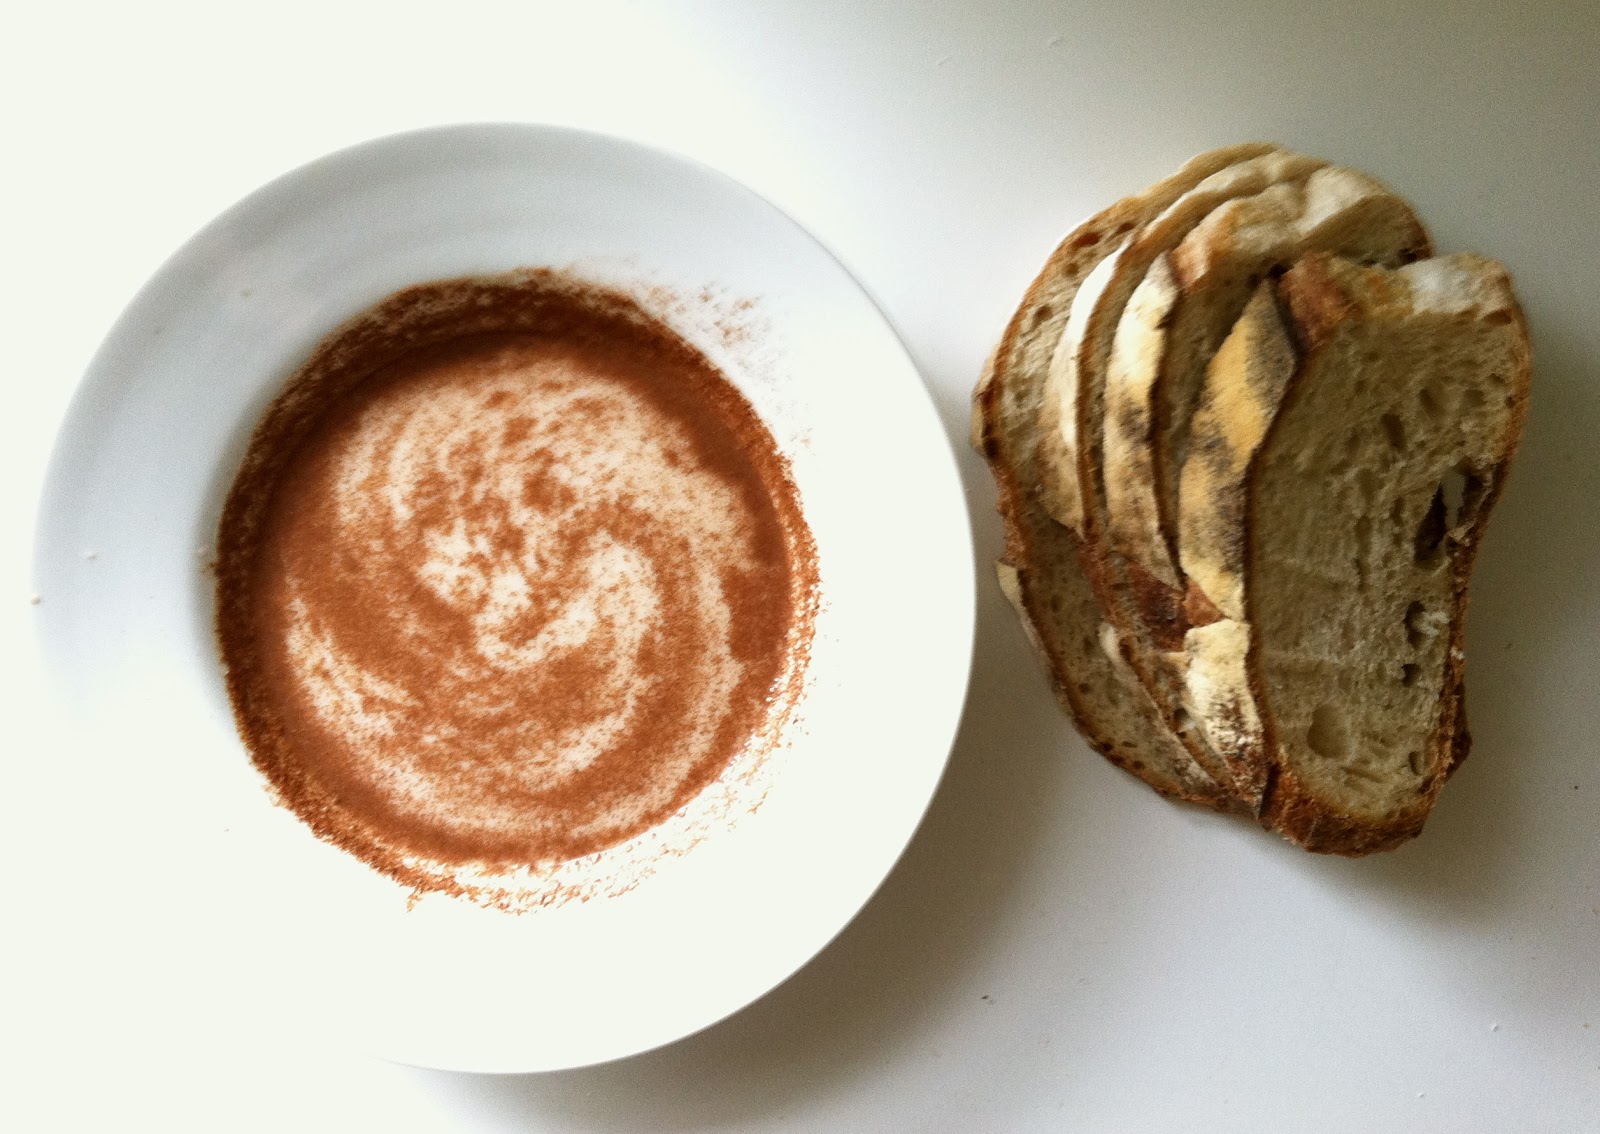
Sourdough slices and cinnamon-swirled hempmilk ready for bread dipping. 
Dipped sourdough, ready for the griddle. 
Vegan Cinnamon
Sourdough French Toast
Recipe:
(makes roughly 6-8 slices)

6-8 slices of thickly cut sourdough bread
1 1/2c non dairy milk
1tbsp all purpose flour
1 1/2tsp ground cinnamon
1 tsp vanilla extract
1tsp organic sugar
1/4tsp salt

 3tbsp vegan margarine
or
coconut oil


In a medium bowl combine milk, flour, cinnamon, vanilla, sugar and salt.
Whisk until well combined.
Pour into square pan or baking dish.
Dip each bread slice into the liquid quickly, then flip and repeat on the other side.
You do not need to completely submerge the slice, just dip it lightly.
The bread should soak up a tiny bit of liquid, but not be sopping wet.

Remove from liquid and allow excess to drip back into the dish.
Set dipped bread on a rimmed platter or baking dish.

*Reserve any leftover dipping mix and keep in the fridge for your next batch.

Heat 1tbsp of vegan butter on griddle over medium high heat.
Once butter has melted, cook french toast for about 1-2 minutes on each side,
or until lightly browned.
Repeat with remaining slices, adding more butter to griddle as needed..
Top with a little extra cinnamon and maple syrup or agave.
Eat!
Breakfast-tacular!

Wednesday, January 23, 2013

Vegan Red Lentil Stew

its too damn cold outside to do anything other than make soup.
Vegan Curried Red Lentil Stew
Measured dried red lentils and turmeric, soon to be stew.
So the temperature here in Boston this AM was hovering somewhere around six degrees. This isn't just regular old winter cold, this is downright offensive cold. Frost covering all of the window panes kind of cold, 3 pairs of socks inside the winter boots kind of cold, earmuffs under a hat under a hood wrapped in a scarf kind of cold. What to do when the temps get this low? Forget all about going outdoors, stay inside and make soup instead! This recipe was born from both the need to use up the bulk red lentils that have been clogging up my pantry shelves (I got a REALLY good deal) and the desire to eat something warming and nourishing that could fend off a looming head cold. This soup covers all of those bases and then some and is chock full of just the right kind of cold-fighting (of both the sickness and temperature variety) spices, like curry powder (DIY recipe here), turmeric, ginger, garlic and crushed red pepper. This is an approximation of a traditional Ethiopian stew, full of rich, bold flavors and incredibly hearty, perfect served alone or over a bed of rice.
Serves 6-8 but can be easily halved for a smaller batch. 
Finished curried red lentil stew, ready for fresh greens. 

Curried Red Lentil Stew
(serves 6-8)

2c dried red lentils, rinsed and picked over
3tbsp olive oil
2 onions diced
8 cloves of garlic, minced
1/4c fresh ginger, minced
1tbsp curry powder 
1tsp ground cumin
2tsp turmeric
1/2c crushed tomatoes
2tsp salt
1 1/2tsp crushed red pepper
8c unsalted vegetable broth
2c chopped fresh spinach, arugula, kale or other 
cooking greens.
Extra salt and crushed red pepper to taste


Heat olive oil in a large stockpot over medium heat.
Add onions and cook for 2-3 minutes until they become fragrant and slightly translucent, 
stirring frequently.

Add garlic and ginger, stirring every 15 seconds or so.
Cook for 1-2 minutes more.
Add curry powder, turmeric, cumin, salt and red pepper, 
cook for 1 minute.

Add lentils, stirring to incorporate into the mix.
Cook for 30 seconds longer, allowing mix to 
become fragrant.


Add stock and tomatoes, stir well to incorporate.
Turn burner to low and simmer partially covered 
for 30 minutes.
Stir every 10 minutes or so.

Once the 30 minutes are up, taste your soup, 
adding more salt if needed.
If the mix looks a little on the thick side, add more stock or water, 1/4c at a time.
Finished stew, topped with local greens and crushed red pepper.

Add half of the fresh chopped greens, stir, and cook uncovered for 15-20 minutes longer, until lentils have broken down and look almost pureed.
Serve hot garnished with the remainder of fresh greens.
Add more crushed red pepper to taste. 


Friday, January 18, 2013

Gluten Free Chickpea Flatbread

accidentally gluten-free.
Socca: Crispy Chickpea Flatbread
Socca, fresh from the oven, dusted with sea salt, black pepper and cumin, with a side of fresh arugula.
If you've read my blog at all, you know I don't really shy away from the gluten. This is one of only a few gluten free recipes in my arsenal, but it is always in heavy rotation. Socca is a fantastically flavorful flatbread that cooks up in a snap and is almost additively simple to make. Because the ratio of flour to water is 1 : 1 it can be easily doubled or halved and, as a bonus, is also super easy to remember. Chickpea flour is naturally gluten free and a must have for any vegetarian/ vegan/ pantry. Add a little olive oil, some salt and pepper and a dash of cumin and you've got the makings for a delicious and incredibly inexpensive, crispy, bread-y treat. The flatbreads can be sliced up into little squares for snacking, or kept whole and eaten as a kind of chickpea crepe, filled with greens or vegetables. 

Socca batter, ready for the oven.
Socca Recipe
(makes about 6-8 flatbreads)

You will need an 8" oven safe skillet for this recipe.

2c chickpea flour
2c water
2 1/2tbsp olive oil
1tsp ground cumin
1/2tsp salt

Salt, pepper and ground cumin
for the finished socca.

Prepare your chickpea batter:
Combine water, flour, 1 1/2tbsp of the olive oil, salt and ground cumin in a medium bowl.
Whisk to combine, cover and set aside for at least 1 hour.


Place about half of the remaining olive oil in your skillet.
Position a rack in the top third of your oven and 
preheat broiler.

Socca with beautifully crisped edges, fresh from the broiler.
Once the oven and pan are heated, CAREFULLY with a potholder or towel
remove pan from the oven, give your socca batter a quick stir,
and add about 1/4cup to the hot oiled pan, swirling until pan is well coated. 
Place back in the oven. 
Cook until socca begins to brown around the edges and bubble,
approximately 5 minutes but times will vary.
Use a spatula to slide cooked socca from pan onto a cutting board.
Sprinkle with salt, pepper and cumin.
Repeat cooking process with remaining socca batter,
adding a bit more olive oil between each batch.

Serve warm. 

Oh yeah.

Wednesday, January 16, 2013

Vegan Caramel Corn

You can even add your own prizes!
Vegan Molasses Tahini "Caramel" Popcorn
Molasses tahini coated "caramel" popcorn.
Cracker Jacks are one of those "accidentally vegan" foods I care not to eat. Plus the prizes are garbage these days. When I was a kid it was all whistles and rings and tiny rubber animals in little plastic domes; now its just slips of paper with word games and tiny temporary tattoos?? Come on. We can do better than that. Make your own! Bundle these up and add your own prizes for tasty and healthy party favors. Or, forget everyone else, just bundle them up and add prizes for yourself. Who among us can say that their day wouldn't be made better by finding a shiny little plastic trinket in their afternoon snack? This is not a guilty little indulgence; molasses tahini popcorn is a surprisingly healthy treat. The blackstrap and tahini are both loaded with viatmins, and coconut oil? Yes please. You can use a regular molasses, but I encourage you to splurge for the blackstrap; its a nutritional powerhouse and has a much richer flavor. I pop my popcorn on the stove top with coconut oil, both delicious and fragrant, but an air popper could be used instead. If popcorn balls are your thing, this is the recipe for you; they are easy to form and store perfectly.

Organic popcorn kernels, off the pantry shelf and ready for popping.


Vegan Molasses Tahini "Caramel" Corn

(makes about 6 cups, prepared)

1c of unpopped popcorn
3tbsp of non-hydrogenated
virgin coconut oil
1/4c unsulphured
blackstrap molasses
1/4c tahini
1/4tsp salt

1/4c salted or
unsalted peanuts
(optional)

If preparing popcorn on the stove top:

Heat 2tbsp of coconut oil in heavy bottomed pot with lid over medium high heat.
Once oil has melted, add popcorn and cover pot.
As popcorn begins to pop, shake pot back and forth over the burner a couple few times, this will prevent the popcorn from burning.
When popcorn popping slows to a few seconds between pops, remove pot from heat.

Measuring out organic virgin coconut oil for corn popping.

Let sit until popping stops.
Uncover and set aside.

Preparing molasses tahini sauce:
In a small saucepan, heat remaining 1tbsp of coconut oil over medium low heat.
Add molasses, tahini and salt, whisk to combine.
Reduce heat to low.
Continue to whisk mixture until it is well incorporated and softened, about 2-3 minutes.

Remove from heat.

Position rack in center of oven and
preheat to 350 degrees.

Drizzle molasses tahini mix into the popcorn, using a large spoon to stir as you go.


Once all the molasses tahini mix has been added, continue to stir until well distributed.

There will be some areas of the popcorn with more
molasses tahini mix and some with less.
Once the molasses mix has cooled slightly, I like to go in with my hands
and mix everything together a little bit better.
If adding peanuts, stir them in.

Spread your coated popcorn onto a baking sheet.
Bake on the center oven rack for 5-6 minutes.
Remove from oven and allow to cool completely.
Store in an airtight container.

If making popcorn balls:
Grab a hand full of popcorn mix, about 1/3 cup,
and form loosely into a ball.
Placed formed balls on a cookie sheet.
Bake at 350 for 5-6 minutes.
Remove from oven and allow to cool completely.
Store in an airtight container at room temperature.

Oh yeah.

Tuesday, January 15, 2013

Candied Orange Peels

What's better than winter citrus? Winter citrus candy!
Waste not, want not:
Candied Navel Orange Peels
Candied orange peels, coated in sugar and fully dried. Time to add some dark chocolate!
I hate to waste food. This is evidenced by my freezer full of vegetable scraps, the many bins of compost around the perimeter of our yard, the constant rotation of pickling/ preserving projects in the pantry and, in the winter, the big tupperware container full of orange peels in the fridge. 

A big box of Florida oranges is a Christmas tradition in my family; started by my grandparents and now continued by my mom and dad.  When I depart my childhood home after the holidays, I do so with a more than generous box or bag full of oranges.  I never juice them or do much other than just eat them. Being able to eat a fresh, juicy orange almost every day during the long, dark New England winter is a true gift, there are few foods more uplifting. But what to do with all of those peels??
Saved navel orange peels, sliced into matchsticks.

You're telling me I can make CANDY???

Done and done.

Candied orange peels are a lovely little treat, perfect with an afternoon cup of tea. The cooking process gives the peels a soft, almost jelly-like texture. Elegant, delightfully fragrant and delicious, they are the perfect winter dessert, also a great way to preserve the flavor of fresh seasonal citrus for the rest of the year. I highly recommend coating your finished orange peel with a bit of melted dark chocolate.
Trust me on this one.


Saved navel orange peels, waiting to be candied.


Candied Orange Peels:

You will need:
Peels of 6-8 oranges,
navels work best,
cut into 1/4" matchsticks (about 2c)
3c water
2.5c vegan organic sugar

9 cups of boiling water,
for blanching.
extra sugar, approx. 1/2c for coating

Dark chocolate for dipping, optional

Slice your orange peel into approximately 1/4" thick matchstick style strips, removing any pulp or exterior blemishes.
Once sliced, you should have roughly 2-2 1/2c of orange peel.

Combine orange peel and 3 cups of water in a medium saucepan.
Bring to a boil over medium high heat for 5 minutes.
Drain peels and water and repeat 2 more times.
This will soften the peels, making for a better texture and remove the bitterness.

Orange peels after boiling in sugar water.

Once final boil is complete, drain the peels.
Add 3 cups of water and 2.5cups of sugar to the saucepan.
Bring to a boil over medium high heat, stirring until sugar has dissolved.
Add orange peels to the liquid, stir very gently to combine.
Return to a boil, then reduce heat to medium low.
Simmer peels for 45 minutes to 1 hour, or until they become translucent
and liquid has thickened.

Using a slotted spoon, place peels in a strainer to drain.

*Reserve cooking liquid


Fill a shallow bowl with the extra 1/2 cup of sugar.
Using a pair of small plastic tongs or your fingers,
take about 1/4 cup of the candied peels and toss in the sugar.
Gently stir to coat, then remove from bowl.
Separate peels and carefully lay out on a drying rack or baking sheet lined with plastic wrap.
Repeat this process with the remainder of the peels.
 Allow to air dry for at least 12 hours.
The peels are ready to store once the coating is dry.
Store in an airtight container, keep at room temp or store in the freezer.
They will keep for at least 6 months.

*Save the reserved cooking liquid in a glass bottle/jar with a tight fitting lid. You have essentially made an orange-infused simple syrup. This is a great add in for cocktails.

Making dark chocolate covered candied orange peels:
To make this treat a wee bit more indulgent, coat your peels in dark chocolate.
Trust me, this extra step is worth it.
Once your candied peels have dried,
melt dark chocolate over a double boiler or in the microwave.
Dip one end of sugared peel into the melted chocolate and place on a silpat
or baking sheet coated with plastic wrap to dry.
Store in the same way.
Candied orange peels, dipped in dark chocolate. Nothing wrong with that. 

Monday, January 14, 2013

Whole Wheat Pita

Homemade Whole Wheat Pita 
or how i learned to stop worrying and love the poof.
insert "leaning tower" joke here.

Not to oversell or anything, but learning to bake bread will change your life. And, as a tidy little bonus, it will forever impress your loved ones
and save you a ton of money. Downside? Not a one.
I've been rocking this particular pita recipe for a few years now and can wholeheartedly attest to its life-change-y goodness. The mechanics of it may still confuse the hell out of me (WHY DOES IT POOF??), but the finished product is so damn good the worries and confusion just melt away.

Don't ask questions.
Just learn to love the poof.


Friday, January 11, 2013

Pickled Watermelon Radishes

pretty food makes me happy, and so do homemade pickles.
Asian-Style Pickled Watermelon Radishes
Peeled watermelon radishes from the Egleston winter farmer's market. Gorgeous.
Watermelon radishes, peeled and stem end removed.

Watermelon radishes are like the quiet cool kids of the radish world. Their muted exteriors bear no clues to the beautiful shock or color contained within; poetic huh? What can I say? There are few fruits or vegetables quite as stunningly inspiring as these little tubers. Slicing one open never fails to put a smile on my face, and maybe a little poetry in my head. Yes, radishes are something of an acquired taste, but if you're trying to gently ease into radish-world, they're a damn good way to start. 

Watermelon radish slices, ready for pickling.
While traditional radishes have an strong earthy smell and taste, watermelon radishes are much milder and slightly sweet making them a fantastic raw snack. They generally grow larger, usually a couple of inches in diameter, making them perfect for slicing and, of course, pickling. This recipe is for an Asian-flavored pickle and includes some traditional ingredients such as rice vinegar, sesame oil and coriander. I quite literally always have a jar of these in my fridge as they are a key component in one of my all time favorite meals: pickled watermelon radishes on a bed of seasoned sushi rice, topped with toasted seaweed. The Asian flavors in the pickles play beautifully off the seasoned sushi rice and the crunchy seaweed, making for a perfect and healthy one-bowl meal. They are also a fantastic snack all on their own or delicious (and gorgeous) paired with a light avocado-citrus salad. 

Radishes and onion slices with coriander seeds.. 
Asian-Style Pickled Watermelon Radishes
You will need a clean pint jar with a tightly fitting lid 

1 large watermelon radish (approximately 1c sliced); 
scrubbed, peeled and cut into 1/8" thick slices
1 small white onion, halved and cut into 1/8" thick slices
1 tbsp apple cider vinegar
3 tbsp rice vinegar
1/2 tsp salt
1 tsp organic sugar
1 tsp ground coriander seeds
1 tbsp sesame oil
1 tsp olive oil
pinch of ground pepper

Finished recipe, ready to be covered and chilled. 

Slice watermelon radishes and onions and place in medium sized bowl.
Add vinegars, salt, sugar, coriander, oils and a pinch of pepper, stir to combine. 
Cover bowl tightly with plastic wrap and refrigerate for 12 hours; 
this will give the flavors time to develop.

They are ready to eat after 12hrs in the fridge, but the longer you leave them, 
the deeper the flavor will be.

Transfer radishes to a clean glass jar with a tightly fitting lid.

Will keep refrigerated for up to a month.
Keep these in the fridge and just try to resist eating them all.

Tuesday, January 8, 2013

Vegan Curried Split Pea Soup

put some curry on it...
On the Cheap: Vegan Curried Split Pea Soup
Finished vegan curried split pea soup, hot off the stove and ready to eat. 
Split pea soup is something I'd always WANTED to like. The concept of it always appealed to me, but I was never able to find a vegan version that was more than just a big bowl of ok. The heat and eat cans served their purpose but were somewhat pricey and pretty lacking in the flavor department. Then there's the glop factor. Bad split pea soup can have a texture/taste somewhat comparable to that of unseasoned dehydrated mashed potatoes. Yuck.
So after years of fruitless searching, and a lot of mediocre soup,
I set out to perfect a recipe of my own.
Soup ingredients still life: carrots, onion, split peas and curry powder.

With a little experimentation and a dash of curry powder, this recipe was born. Holding true to the "on the cheap" header of the post, dried split peas can easily be found for about a dollar per pound at your local grocery store. Store bought vegetable stock is relatively inexpensive or you can do homemade with leftover veggie scraps. The priciest ingredient will be the curry powder. If there is a co-op in your neighborhood you may be able to purchase it in bulk there.

If not, an Asian/ Indian grocery is a good place to seek out less expensive spices. If neither of these options are available to you just grab the curry powder from the grocery store. At about $5-6 per jar it won't break the bank, gives you a lot of bang for your buck flavor wise, and is worth having in your spice drawer for future recipes. 
Local carrots, peeled, sliced into discs and ready to be added to soup mix. 

When buying in bulk and using homemade stock, this recipe can be put together for between $3.50 and $5.00. Not too shabby for a pot of soup that serves 8-10.

*Note that this is an unblended soup. While a number of split pea soup recipes call for blending in the final step, I've found that if the peas are cooked properly they break down beautifully on their own, eliminating the 
need for blending.

Vegan Curried Split Pea Soup
(serves 8-10)

11b (about 2c) of dried green split peas 
2 tbsp olive oil
1 bunch of carrots (about 8-10) 
peeled and sliced into 1/4' discs
1 onion diced
3 cloves of garlic, finely minced
6 cups of low sodium vegan vegetable stock
1/2c water
2tsp kosher or sea salt
1tbsp madras curry powder
1 1/2tsp ground cumin

More salt and pepper to taste
Onions, garlic, carrots, peas and spices, ready for stock to be added. 

Rinse dried split peas until the water runs clear and pick over for any stones.
In a large stockpot, heat the olive oil over medium heat. 
Add onions and cook for 2-3 minutes, stirring frequently, until they become translucent.
Add minced garlic and cook for an additional 1-2 minutes,
continuing to stir frequently.
Add carrots, curry powder, cumin and 2tsp of salt cooking for an additional minute
until mix becomes aromatic, stirring frequently.
Add in rinsed split peas, stirring to combine and cook for an additional 30 seconds. 
Add in the vegetable stock and water and bring to a boil, stirring frequently.
Once soup is boiling reduce heat to low, 
cover and simmer for 45 minutes to 1hr, stirring occasionally. 
Once the peas are no longer holding their shape and the mixture
has thickened the soup is ready.
If you find the mixture to be a bit too thick, 
add additional water or stock 1/3c at a time. 
Add additional salt and pepper to taste. 
Local carrot line-up. Just because. 

Friday, January 4, 2013

Vegan Pancakes

Pancakes are like a Toyota...
(Old Reliable) Homemade Vegan Pancakes
How good do these look?? Big ol' stack of vegan pancakes, fresh off the griddle. 
Pancakes are like that favorite old car that never lets you down; the Toyota Camry of the breakfast world, if you will. They're comforting in their reliability, consistently filling and are the very definition of no-fuss. While waffles are showy and time consuming, pancakes will always get you quickly where you need to go, if where you need to go is full and breakfast-happy. Waffles are all well and good, don't get me wrong, but sometimes you just want a pancake or two (or 8). This recipe has been a go to for me since I first became vegan way back when. Its an easy one to remember, the ratio of flour to non-dairy milk is 1:1, cooks up quickly and always satisfies even my heartiest pancake cravings.

Another pancake stack glamour shot.. 
Best Ever Vegan Pancakes
(makes about 12 medium sized pancakes)

You will need a griddle or non-stick frying pan
2c all purpose flour
(I like to sub in 1/2c of whole wheat for 1/2c of the white)
2c unsweetened non dairy milk
1 tsp white vinegar
1/4c baking powder
1 tsp salt
1tsp organic sugar
1/4c melted vegan butter

extra vegan butter for greasing
the hot griddle


Melt 1/4c vegan butter in a microwave safe bowl.
In a medium mixing bowl combine flour, sugar, salt and baking powder.
Whisk to combine.
Measure out non dairy milk and add to dry mix.
Add in vinegar and melted butter.
Whisk until well combined.
Batter will froth up due to the baking powder and vinegar.
Continue to stir until all your ingredients are well combined
and mix seems moist and batter-like.
If you find your mix slightly dry add another tsp or two of non dairy milk.
Pancake batter, melted butter added, ready for the griddle. 
*Note that stove top temps and cooking times vary quite a bit.
I have a gas range and use a cast iron griddle and have found that medium high heat works best, cooking the pancakes for 1-2 minutes on each side. If you're using a thinner pan or have an electric range your time and temp will vary a bit. The best thing to do is start your temp on the lower end and turn it up a bit if needed.
Don't want to burn all of your pancakes!

Heat your griddle with one tbsp of vegan butter over medium heat.
Once butter has melted measure pancake batter onto the griddle 1/3c at a time.
Once your pancake has begun to bubble both around the edges and in the center (about 1 minute).
Flip and cook for a minute or two more on the other side.
Add more butter to your griddle as needed while cooking.

Keep your pancakes on a plate in a slightly warmed oven, covered with a
bowl or loosely with foil to keep them from cooling and drying out.

Top finished pancakes with more vegan butter and a drizzle of agave or maple.
Commence face-stuffing. 

Homemade Vanilla Extract

Less buying, more diy-ing:
Homemade Bourbon Vanilla Extract
Gorgeous homemade bourbon vanilla extract in the morning light. 
Like yesterday's DIY brown sugar post, once you've experience the taste of homemade vanilla extract you'll never go back. Again like yesterday's post, this requires but two ingredients: fresh vanilla pods and alcohol. This one will require a wee bit of patience; once assembled the vanilla needs a few weeks for the flavor to deepen properly, but the payoff is enormous. There is no comparison between homemade and store bought; where store bought smells/tastes weak and over alcohol-y, homemade is rich and full of natural vanilla aroma and taste.
Whole vanilla beans, stem ends. Ready to be turned into extract. 
While most DIY vanilla recipes call for a neutral alcohol like vodka, I prefer to use an unblended whiskey or bourbon. The natural oak-y notes in bourbon blend perfectly with the fresh vanilla to create a mellow yet robustly flavored extract that is still perfect for baking. The ability to easily replenish your supply is one of the very best things about DIY vanilla extract. When you're running a little low just add a bit more alcohol, maybe another split vanilla bean and voila, you're topped off. Now I do a lot of baking, so my vanilla lives in an old 750ml Bulleit Rye bottle, not only is it a beautiful bottle that looks pretty bad ass on my pantry shelf but its also just the right size for my needs. If you bake less frequently maybe a smaller size is in order. A little tip though, homemade vanilla extract makes a fantastic gift, so why not make a big batch and share it with some well deserving friends?

Homemade Vanilla Extract:

You will need a glass bottle or jar with a screw top
or tightly fitting corked lid
funnel
fresh vanilla beans

You will need a ratio of approximately 3 vanilla beans per 1 cup of alcohol

Using a small, sharp knife split your vanilla beans lengthwise by making a cut just below the stem and run your knife along the length of the bean,
splitting it in two,
leaving stem end attached.


Using the knife, scrape the pulp from the interior of one of the split vanilla beans.
Place the scraped pulp into your jar or bottle.
Add split vanilla beans, including the scraped one.
Funnel the appropriate amount of alcohol into the bottle.
Tightly cover your bottle or jar and give it a good shake.

Place your bottle/ jar in a cool, dark place and allow it to sit for at least 4 weeks.
Be patient!
The longer you let the vanilla beans steep in the alchol,
the darker and richer your extract will be. 
My big ol' bottle of homemade vanilla extract. Needs a bourbon top-off. 

Thursday, January 3, 2013

Homemade Brown Sugar

Time to stop buying, and start making:
DIY (Vegan) Brown Sugar
DIY brown sugar, ready for baking, and a bottle of Plantation Blackstrap molasses. 
There are at least three fundamental truths about cooking/baking me that apply to this post. One: I'm a cheapskate, theres no denying it. Two: I like to DIY whenever/ wherever possible and three: I like/ need my pantry to be VERY well stocked at all times. Organic vegan sugar and black strap molasses are two things I ALWAYS have on the shelves. These are the only ingredients you'll need to make your very own brown sugar. We've all had plenty of experience with store bought kind; its always rock hard or clumpy, or (if buying organic) a little too pricey for what it is. Why not just make it yourself? Less buying, more DIY-ing! After making this and using it for the first time you'll wonder how you ever used anything else. You can halve or quarter or double the recipe; make a large batch and store it in an airtight container for as long as it lasts, or make it as needed for your recipe. As long as you have molasses and sugar on hand you can whip it up in a snap.

I prefer unsulphured blackstrap molasses over traditional molasses. Its a bit more expensive but is more flavorful and a bit sweeter with a much higher nutrient content, including potassium, B vitamins and 20% of your RDA of iron per tablespoon (we vegans always need a little more iron in our diets). Blackstrap is a richer, darker molasses, so a small amount will make a very light brown sugar, the more you add the darker it will get. I usually begin with 2tbsp to 1 cup of sugar,
adding more if I want the sugar a bit darker. 

If you decide to splurge for the blackstrap molasses, and I strongly encourage you to do so, here's a little side recipe for you:
Stir 1 tbsp of molasses into a heated cup of your favorite non-dairy milk and drink up.
That's it! Its a delicious and nutritious warm winter beverage, perfect for breakfast on a snowy day or just when you need a little pick-me-up.
A great iron boost too!

Molasses drizzled over organic sugar, ready to mix.

this will be a short recipe...
DIY Brown Sugar:
1 cup of organic vegan sugar
2-4 tbsp of unsulphered
blackstrap molasses

Place your sugar in a large bowl.
Drizzle in 2 tbsp of molasses to start. 
Using a dinner fork, mix the molasses into the sugar until it is well incorporated.
This should take a few minutes. Don't get discouraged if it look like the mix isn't coming together, keep mixing, it will incorporate perfectly.
If you find small molasses chunks remaining, simply break them up with your fork and mix them in.

If you want your brown sugar darker, repeat the process with the extra
1-2tbsp of molasses until you reach the desired color.

And there you have it. 5 minute DIY brown sugar. How easy was that???
Now get baking!